Showing posts with label OpenWRT. Show all posts

Friday, 3 September 2021

First Time Setting New MT7688 Module

 Got a new module, how to set network easily?

1. Connect your PC to the WAN port.

2. Serial connect to the board:

$ screen /dev/ttyUSB0 57600

$ ifconfig

br-lan Link encap:Ethernet HWaddr 1C:88:79:56:43:0F
inet addr:192.168.1.1 Bcast:192.168.1.255 Mask:255.255.255.0
inet6 addr: fd40:27d8:7c5f::1/60 Scope:Global
inet6 addr: fe80::1e88:79ff:fe56:430f/64 Scope:Link
UP BROADCAST RUNNING MULTICAST MTU:1500 Metric:1
RX packets:1333 errors:0 dropped:0 overruns:0 frame:0
TX packets:1284 errors:0 dropped:0 overruns:0 carrier:0
collisions:0 txqueuelen:0
RX bytes:92554 (90.3 KiB) TX bytes:106278 (103.7 KiB)

3. Go back to PC and open a browser, put down 192.168.1.1

Default password is root.


Tuesday, 1 September 2020

Tinkering OpenWRT (20) : Flash Compiled Image

Step 1: 

After compiling, the bin file should be located in :
openwrt/bin/ramips/openwrt-ramips-mt7620-XXXXX-squashfs-sysupgrade.bin

Step 2:

Copy the bin file to board 
scp openwrt-ramips-mt7620-XXXXX-squashfs-sysupgrade.bin root@192.168.1.1:/tmp

Step 3:
Login board, ether via UART or Ethernet

Step 4:
cd /tmp
# make sure the file transfer is completed 
md5sum openwrt-ramips-mt7620-xiaomi-miwifi-mini-squashfs-sysupgrade.bin 
mtd -r write openwrt-ramips-mt7620-xiaomi-miwifi-mini-squashfs-sysupgrade.bin firmware

Wait for it to finish...

Friday, 3 July 2020

Tinkering OpenWRT (19) : HiLink 7866A Serial Login

I don't want to figure this out again, so here it is:

- Use COM0
- screen /dev/ttyUSB0 57600

Tuesday, 13 August 2019

Tinkering OpenWRT (18) : Toubleshooting MT7688AN Hardware


Problem (1) : Serial to TTL not working
     - Try use a laptop instead of a desktop. There might be compatibility issue between the motherboard and USB. Or just not enough power from USB on a desktop.
     - Try use a higher input than 3v3. Even 5v works.

ref:
https://blog.csdn.net/u012175418/article/details/52572672


Wednesday, 26 December 2018

Tinkering OpenWRT (17) : trouble shooting (build source code) target 'world' failed problem

I am trying to compile openwrt and got the following error:

include/toplevel.mk:216: recipe for target 'world' failed

I tried using 15.05 and checked out 18.06 (yes the head master is not newest 18.06) and I got the similar problem. Only the line number is sometimes different. After googling a loooooot, I found the simple solution.

$ make distclean
$ make clean

maybe also make defconfig

And $ make V=99

After over night...I found the image in bin/targets.


ref:
https://www.right.com.cn/forum/thread-186603-1-1.html
https://www.gargoyle-router.com/phpbb/viewtopic.php?t=8011&start=10

Tuesday, 25 December 2018

Tinkering OpenWRT (16) : openwrt Chaos Calmer Build dependency: Please install Git (git-core) >= 1.6.5


For some reason, I'd like to build my openwrt from 15.05 Chaos Calmer. But I ran into the following problem:

~/workspace/chaos_calmer$ make menuconfig 
Checking 'working-make'... ok.
Checking 'case-sensitive-fs'... ok.
Checking 'gcc'... ok.
Checking 'working-gcc'... ok.
Checking 'g++'... ok.
Checking 'working-g++'... ok.
Checking 'ncurses'... ok.
Checking 'zlib'... ok.
Checking 'libssl'... ok.
Checking 'tar'... ok.
Checking 'find'... ok.
Checking 'bash'... ok.
Checking 'patch'... ok.
Checking 'diff'... ok.
Checking 'cp'... ok.
Checking 'seq'... ok.
Checking 'awk'... ok.
Checking 'grep'... ok.
Checking 'getopt'... ok.
Checking 'stat'... ok.
Checking 'md5sum'... ok.
Checking 'unzip'... ok.
Checking 'bzip2'... ok.
Checking 'wget'... ok.
Checking 'perl'... ok.
Checking 'python'... ok.
Checking 'svn'... ok.
Checking 'git'... failed.
Checking 'file'... ok.
Checking 'openssl'... ok.
Checking 'ldconfig-stub'... ok.

Build dependency: Please install Git (git-core) >= 1.6.5

/home/boris/workspace/openWRT_build/openwrt_RPi/chaos_calmer/include/prereq.mk:12: recipe for target 'prereq' failed
Prerequisite check failed. Use FORCE=1 to override.
/home/boris/workspace/openWRT_build/openwrt_RPi/chaos_calmer/include/toplevel.mk:140: recipe for target 'staging_dir/host/.prereq-build' failed
make: *** [staging_dir/host/.prereq-build] Error 1

##########################################################################

Solution:

Step 1: Download the patch from here:
https://gitlab.labs.nic.cz/turris/openwrt/uploads/0673001b14ab1d1769604ff0ce7d8781/git-version-check-fix.patch

Step 2: put the patch file under the chaos calmer source code

Step 3: patch it
git apply git-version-check-fix.patch


ref:
https://forum.openwrt.org/t/solved-how-to-compile-15-05-release-build-dependency-please-install-git-git-core-1-6-5-message/11623/3
https://gitlab.labs.nic.cz/turris/openwrt/issues/56
https://github.com/spack/spack/issues/5329

Friday, 5 October 2018

Tinkering OpenWRT (15) : Use I2C Bus


Step 1: Do as the official document says

# opkg update 
# opkg install kmod-i2c-gpio-custom kmod-i2c-core 
# insmod i2c-dev 
# insmod i2c-gpio-custom bus0=0,26,12 
# dmesg | grep gpio 
Mar 23 09:01:23 openwrt kern.info kernel: [ 52.910000] Custom GPIO-based I2C driver version 0.1.1 
Mar 23 09:01:23 openwrt kern.info kernel: [ 52.910000] i2c-gpio i2c-gpio.0: using pins 26 (SDA) and 12 (SCL)
Im using my AR9331 board, and Im using GPIO 26 and 12 as my SDA and SCL repectively.
And then what? The official doc just stops here?

Step 2 : Wiring

AR9331        Slave
SDA              SDA
SCL               SCL
GND             GND       <= this is very important

Step 3 : install i2c-tools

# opkg update && opkg install i2c-tools

Step 3 : install i2c-tools
# i2cdetect 0 

WARNING! This program can confuse your I2C bus, cause data loss and worse! 
I will probe file /dev/i2c-0. 
I will probe address range 0x03-0x77. Continue? [Y/n] y
       0 1 2 3 4 5 6 7 8 9 a b c d e f 
00: -- -- -- -- -- -- -- -- 08 -- -- -- -- 
10: -- -- -- -- -- -- -- -- -- -- -- -- -- -- -- -- 
20: -- -- -- -- -- -- -- -- -- -- -- -- -- -- -- -- 
30: -- -- -- -- -- -- -- -- -- -- -- -- -- -- -- -- 
40: -- -- -- -- -- -- -- -- 
48 -- -- -- -- -- -- -- 
50: -- -- -- -- -- -- -- -- -- -- -- -- -- -- -- -- 
60: -- -- -- -- -- -- -- -- -- -- -- -- -- -- -- -- 
70: -- -- -- -- -- -- -- -- 

try this...
# i2cget 0 0x48 0 w


ref:
https://wiki.openwrt.org/doc/hardware/port.i2c
https://www.cnblogs.com/fastwave2004/articles/4250604.html     !!!!
http://linux-adm5120.sourceforge.net/openwrt/i2c/

Friday, 14 September 2018

Tinkering OpenWRT (14) : Python MQTT Setup


root@JoySince:~# mosquitto_sub  -t "topic" -v
topic OFF


####################################

Could download directly from openwrt:

root@JoySince:/tmp# wget --no-check-certificate https://pypi.python.org/packages
/source/p/paho-mqtt/paho-mqtt-1.1.tar.gz
wget: not an http or ftp url: https://pypi.python.org/packages/source/p/paho-mqtt/paho-mqtt-1.1.tar.gz

Download to PC and upload it to openwrt:
scp -P 2022 paho-mqtt-1.1.tar.gz root@192.168.0.24:/tmp/

Cannot unzip it...
root@JoySince:/tmp# tar xfz paho-mqtt-1.1.tar.gz
tar: can't open 'z': No such file or directory

Unzip locally on PC and upload to openwrt
scp -P 2022 -r paho-mqtt-1.1/ root@192.168.0.24:/tmp/

cd paho-mqtt-1.1
python setup.py install


ref
https://github.com/relayr/python-sdk/blob/master/docs/manual/openwrt.txt
http://lukse.lt/uzrasai/2015-02-internet-of-things-messaging-mqtt-2-install-python-clients-on-pc-carambola-rpi/
http://www.steves-internet-guide.com/into-mqtt-python-client/
http://www.steves-internet-guide.com/publishing-messages-mqtt-client/


Thursday, 13 September 2018

Tinkering OpenWRT (13) : Setup MQTT


Step 1: Install on openWRT
opkg update 
opkg install mosquitto mosquitto-client libmosquitto
Step 2: Start up
/etc/init.d/mosquitto enable
/etc/init.d/mosquitto restart

Step 3: Install on PC with Ubuntu
Many suggest test on the same machine with localhost. But once the mosquitto_sub will hang the terminal on openwrt, so I installed MQTT on my PC and used it as the client.

$ sudo apt-add-repository ppa:mosquitto-dev/mosquitto-ppa 
$ sudo apt-get update 
$ sudo apt-get install mosquitto 
$ sudo apt-get install mosquitto-clients
Step 4: Start the sub on openwrt
root@JoySince:~# mosquitto_sub  -t "topic" -v

Step 5: Ping the openwrt on PC
$ mosquitto_pub -h OPENWRT_IP_ADDRESS -t "topic" -m "test message"
$ mosquitto_pub -h OPENWRT_IP_ADDRESS -t "topic" -m "enjoy"

Result on openwrt:
root@JoySince:~# mosquitto_sub  -t "topic" -v
topic test message
topic enjoy


ref:
https://mosquitto.org/blog/2011/08/mosquitto-on-openwrt/
https://blog.csdn.net/hehexiaoxia/article/details/72834625
https://loralandia.com/mosquitto-mqtt-broker-installation-on-openwrt/
https://blog.csdn.net/xiaoreqing/article/details/77571881

Monday, 3 September 2018

Tinkering OpenWRT (12) : Cross-Compile the Helloworld Program


Step 1: Download the SDK 

Download
OpenWrt-SDK-ar71xx-for-linux-x86_64-gcc-4.8-linaro_uClibc-0.9.33.2.tar.bz2

from

http://archive.openwrt.org/barrier_breaker/14.07/ar71xx/generic/

Two things you need to know. The openWRT version running on your board, in my case, barrier_breaker. The chipset of your board, in my case, ar9331.


Step 2: Create the working structure

cd package
mkdir helloworld
cd helloworld
mkdir src
cd src
touch helloworld.c
touch Makefile

tree:

OpenWrt-SDK-ar71xx-.../package/helloworld
├── Makefile
└── src
    ├── helloworld.c
    └── Makefile
The Makefile in /src/ is just local compiling for checking if there is any coding errors.
The Makefile ourside /src/ is the real cross-compiling makefile.

Step 3: coding

~/helloworld/src/helloworld.c:
#include <stdio.h> int main(void) { printf("Hell! O' world, why won't my code compile?\n\n"); return 0; }

~/helloworld/src/Makefile:
# build helloworld executable when user executes "make" helloworld: helloworld.o $(CC) $(LDFLAGS) helloworld.o -o helloworld helloworld.o: helloworld.c $(CC) $(CFLAGS) -c helloworld.c # remove object files and executable when user executes "make clean" clean: rm *.o helloworld


Step 3: Cross-compiling Makefile


##############################################
# OpenWrt Makefile for helloworld program
#
#
# Most of the variables used here are defined in
# the include directives below. We just need to
# specify a basic description of the package,
# where to build our program, where to find
# the source files, and where to install the
# compiled program on the router.
#
# Be very careful of spacing in this file.
# Indents should be tabs, not spaces, and
# there should be no trailing whitespace in
# lines that are not commented.
#
##############################################
 
include $(TOPDIR)/rules.mk
 
# Name and release number of this package
PKG_NAME:=helloworld
PKG_RELEASE:=1
 
 
# This specifies the directory where we're going to build the program. 
# The root build directory, $(BUILD_DIR), is by default the build_mipsel
# directory in your OpenWrt SDK directory
PKG_BUILD_DIR := $(BUILD_DIR)/$(PKG_NAME)
 
 
include $(INCLUDE_DIR)/package.mk


# Specify package information for this program.
# The variables defined here should be self explanatory.
# If you are running Kamikaze, delete the DESCRIPTION
# variable below and uncomment the Kamikaze define
# directive for the description below
define Package/helloworld
 SECTION:=utils
 CATEGORY:=Utilities
 TITLE:=Helloworld -- prints a snarky message
endef
 
 
# Uncomment portion below for Kamikaze and delete DESCRIPTION variable above
define Package/helloworld/description
        If you can't figure out what this program does, you're probably
        brain-dead and need immediate medical attention.
endef


# Specify what needs to be done to prepare for building the package.
# In our case, we need to copy the source files to the build directory.
# This is NOT the default.  The default uses the PKG_SOURCE_URL and the
# PKG_SOURCE which is not defined here to download the source from the web.
# In order to just build a simple program that we have just written, it is
# much easier to do it this way.
define Build/Prepare
 mkdir -p $(PKG_BUILD_DIR)
 $(CP) ./src/* $(PKG_BUILD_DIR)/
endef
# We do not need to define Build/Configure or Build/Compile directives
# The defaults are appropriate for compiling a simple program such as this one
# Specify where and how to install the program. Since we only have one file,
# the helloworld executable, install it by copying it to the /bin directory on
# the router. The $(1) variable represents the root directory on the router running
# OpenWrt. The $(INSTALL_DIR) variable contains a command to prepare the install
# directory if it does not already exist.  Likewise $(INSTALL_BIN) contains the
# command to copy the binary file from its current location (in our case the build
# directory) to the install directory.
define Package/helloworld/install
 $(INSTALL_DIR) $(1)/bin
 $(INSTALL_BIN) $(PKG_BUILD_DIR)/helloworld $(1)/bin/
endef
# This line executes the necessary commands to compile our program.
# The above define directives specify all the information needed, but this
# line calls BuildPackage which in turn actually uses this information to
# build a package.
$(eval $(call BuildPackage,helloworld))

Step 4: Compile

Go to the root directory of the compiler and make:
make V=s

Step 5: Find the .ipk

If the compiling passes, you can find helloworld_1_ar71xx.ipk in

OpenWrt-SDK-ar71xx-for-linux-i686-gcc-4.6-linaro_uClibc-0.9.33.2/bin/ar71xx/packages/base

Step 6: upload the .ipk to the board

scp helloworld_1_ar71xx.ipk root@192.168.0.24:/root/

Step 7: Install the package
opkg install helloworld_1_ar71xx.ipk
Step 8: run the program
just run

$ helloworld

or

$ /bin/helloworld

or

check it with
$ opkg list


ref:
http://archive.openwrt.org/barrier_breaker/14.07/ar71xx/generic/
https://www.gargoyle-router.com/old-openwrt-coding.html
https://blog.csdn.net/luck_good/article/details/23517135
http://www.uubook.net/article/detail/116354.html


Sunday, 2 September 2018

Tinkering OpenWRT (11) : SSH Configuration and Upload Files

Coding is done with cross-compiling. After we pack the compiled package, .pkg file, we need to upload the file to the board and install.

Step 1:
Edit /etc/config/dropbear:
The first option is used if the client is connect to the openwrt AP. The second option is used if both the client and the openwrt board are connected to the router.

config dropbear
        option PasswordAuth 'on'
        option Port '22'
        option Interface 'lan'

config dropbear
        option PasswordAuth 'off'
        option Interface 'wan'
        option Port '2022'
Step 2:
ifconfig  to get the openwrt IP address.
ssh root@192.168.0.24 -p 2022

Enter the password to test the ssh connection.

Step 3:
scp -P 2022 helloworld_1_ar71xx.ipk root@192.168.0.24:/root/

ref:
https://wiki.openwrt.org/doc/uci/dropbear
https://blog.csdn.net/qq_29663071/article/details/79081103
http://blog.51cto.com/lynnteng0/1066795


Friday, 10 August 2018

Hacking Cisco Linksys EA2700


Step 1: taking apart
Note there are three screws to take off.


Step 2: Hook up UART Serial debugger


Step 3:
screen /dev/ttyUSB0 115200


ref:
https://forum.dd-wrt.com/phpBB2/viewtopic.php?t=276769&sid=6a27f6c98e93a870f25587ca2236a2f3
https://forum.dd-wrt.com/phpBB2/viewtopic.php?p=989071&sid=48bddfccb6ab58c28bb44fc91b9b9ca7
https://forum.dd-wrt.com/phpBB2/viewtopic.php?t=51486
https://forum.dd-wrt.com/phpBB2/viewtopic.php?p=773996


Wednesday, 8 August 2018

Tinkering OpenWRT (10) : WiFi Configuration Again

I don't know why my AS9331 board couldn't even ping 192.168.1.1 and I'm getting the following error:
        pingsendto:Network is unreachable

Step 1:

Updated my /etc/config/wireless and /etc/config/network as shown below.

/etc/config/wireless
config wifi-device 'radio0'
        option type 'mac80211'
        option hwmode '11g'
        option path 'platform/ar933x_wmac'
        option htmode 'HT40'
        #option disabled '0'   #REMOVE THIS LINE TO ENABLE WIFI:
        option channel '1'
        option txpower '30'
        option country 'US'

config wifi-iface
        option network 'wan0'
        option ssid 'FIDO_NETWORK'
        option encryption 'psk2'
        option device 'radio0'
        option mode 'sta'
        option bssid 'B8:4C:3F:F:62:68'
        option key '12345678'

config wifi-iface
        option  device  radio0
        option  network lan
        option  mode    ap
        option  ssid    OpenWrt
        option  encryption none

###############################################

/etc/config/network
config switch 'eth1'
        option reset '0'
        option enable_vlan '0'

config interface 'loopback'
        option ifname 'lo'
        option proto 'static'
        option ipaddr '127.0.0.1'
        option netmask '255.0.0.0'

config interface 'lan'
        option ifname 'eth1'
        option proto 'static'
        option ipaddr '192.168.1.1'           # this has to be your router addr
        option netmask '255.255.255.0'

config interface 'wan0'
        option ifname 'wlan0'
        option proto 'dhcp'
        option macaddr '00:CA:01:07:23:96'  # this is the mac addr of the board (router)
        #if mac address not provided, it will take a loooong time (~10min) to connect to the wifi

config interface 'wan1'
        option ifname 'eth0'
        option proto 'dhcp'
        option ifname eth0
        option proto dhcp


Step 2:
/sbin/wifi up

#######################################################

For some reason the above stopped working anymore. There must be some problems. For example, 192.168.1.1 cannot be in lan configuration because this ipaddr indicates the ip address when this AR9931 device acts as the AP for other clients to connect. It has to be something else.

Here are my new configurations and it works!!!

Step 1: Factory Reset
$ firstboot

Step 2:
/etc/config/network

config switch 'eth1'
        option reset '0'
        option enable_vlan '0'

config interface 'loopback'
        option ifname 'lo'
        option proto 'static'
        option ipaddr '127.0.0.1'
        option netmask '255.0.0.0'

config interface 'lan'
        option ifname 'eth1'
        option proto 'static'
        option ipaddr '192.168.6.1'
        option netmask '255.255.255.0'

config interface 'wan0'
        option ifname 'wlan0'
        option proto 'dhcp'

config interface 'wan1'
        option ifname 'eth0'
        option proto 'dhcp'
    option ifname eth0
    option proto dhcp


Step 3:
/etc/config/dhcp

config dnsmasq
        option domainneeded '1'
        option boguspriv '1'
        option filterwin2k '0'
        option localise_queries '1'
        option rebind_protection '1'
        option rebind_localhost '1'
        option local '/lan/'
        option domain 'lan'
        option expandhosts '1'
        option nonegcache '0'
        option authoritative '1'
        option readethers '1'
        option leasefile '/tmp/dhcp.leases'
        option resolvfile '/tmp/resolv.conf.auto'

config dhcp 'lan'
        option interface 'lan'
        option start '100'
        option limit '150'
        option leasetime '12h'
        option dhcpv6 'server'
        option ra 'server'

config dhcp 'wan0'
        option interface 'wan0'
        option ignore '1'

config dhcp 'wan1'
        option interface 'wan1'
        option ignore '1'

config odhcpd 'odhcpd'
        option maindhcp '0'
        option leasefile '/tmp/hosts/odhcpd'
        option leasetrigger '/usr/sbin/odhcpd-update'

Step 4:
/etc/config/wireless

config wifi-device  radio0
        option type     mac80211
        option channel  8
        option hwmode   11g
        option path     'platform/ar933x_wmac'
        option htmode   HT40

config wifi-iface
        option device   radio0
        option network  lan
        option mode     ap
        option ssid     JoySince
        option encryption none

config wifi-iface
        option device 'radio0'
        option network 'wan0'
        option mode 'sta'
        option ssid 'wifi ssid name'
        option encryption 'psk2'
        option key 'wifi password'

Step 5:
/etc/init.d/network restart


ref:
https://my.oschina.net/lvsin/blog/392817     !!!!!!
https://my.oschina.net/lvsin/blog/384410
https://blog.csdn.net/gaopeiliang/article/details/40430915


Thursday, 2 August 2018

Tinkering OpenWRT (9) : Boot Loop? Don't Connect the Power Line!

I bought a core board of AR9331 running openWRT and trying to set it up. I simply used a cp2102 TTL to USB converter trying to serial monitoring it just like other CPUs: RX->TX, TX->RX, GND->GND and 3v3->3v3.

However, the problem I'm having is that it stuck in a boot loop forever. After I see the root@UserName:/# it would start from the top all over again and keeps looping.

I actually first had this experience with linkit smart 7688. I had to power it via the USB and only uses UART pins for serial communication. And I found the following in the openWRT document:

WARNING!: Some people reported they fried their router connecting the voltage pins spite it isn't neccesary. NEVER connect voltage pins when using USB adapters unless you know what are you doing. Unless you need to power the device, you don't have to connect the voltage pins. And you usually don't need to power it this way - use the router power supply.

OK so basically, an independent power line? Fine, I could provide 3v3 to the module with an Arduino. So I did the following connection:

AR9331       CP2102       Arduino
GND            GND            --
RX               TX               --
TX               RX               --
3V3              --                 3V3

Now I plugged in the CP2102 USB to my computer and open up the serial com and then I plugged in the Arduino cable to power it on. I got it stop looping once or twice. But when I come back a few days later it still loops.

So here is my working wiring:

AR9331       CP2102       Arduino
GND            --     works now            GND
RX               TX               --
TX               RX               --
3V3              --                 3V3

Basically, power the module from Arduino and only uses the TTL converter as UART.

I plugged in the TTL converter first and the Arduino cable. It almost like powering on an router after setting up the serial com. It does no loop anymore. I can start working.

It might still showing the following:

root@UserName:/# [ 4082.090000] wlan0: authenticate with ax:4y:zf:fd:12:
[ 4082.100000] wlan0: send auth to ax:4y:zf:fd:12:34 (try 1/3)
[ 4082.110000] wlan0: authenticated
[ 4082.120000] wlan0: associate with ax:4y:zf:fd:12:34 (try 1/3)
[ 4082.140000] wlan0: RX AssocResp from ax:4y:zf:fd:12:34 (capab=0x431 status=0 aid=5)
[ 4082.150000] wlan0: associated
[ 4086.150000] wlan0: disassociated from ax:4y:zf:fd:12:34 (Reason: 2)

It just means it tried to connect to the Router (Internet) but timed out. Press enter again it will come back to console.


ref:
https://wiki.openwrt.org/doc/hardware/port.serial.cables
https://openwrt.org/docs/techref/hardware/port.serial.cables
https://openwrt.org/docs/techref/hardware/port.serial

Monday, 23 July 2018

Tinkering OpenWRT (8) : Connect to WiFi

I just got my new Atheros core board and I'd like to set it up. The first thing of course is just to connect to the wifi and then I can install other things.

Step 1: go to vim /etc/config/wireless
config wifi-iface
        option device   radio0
        option network  lan
        option mode     ap
        option ssid     BorisWRT
        option encryption psk2+tkip+ccmp
        option key 888888

Step 2: Switch WiFi to BorisWRT

Step 3: Figure out the IP address
config interface 'lan'
        option ifname 'eth1'
        option force_link '1'
        option type 'bridge'
        option proto 'static'
        option ipaddr '192.168.1.251'
        option netmask '255.255.255.0'
        option ip6assign '60'

Step 4: go to the above LAN address
We can see the luci gui now.

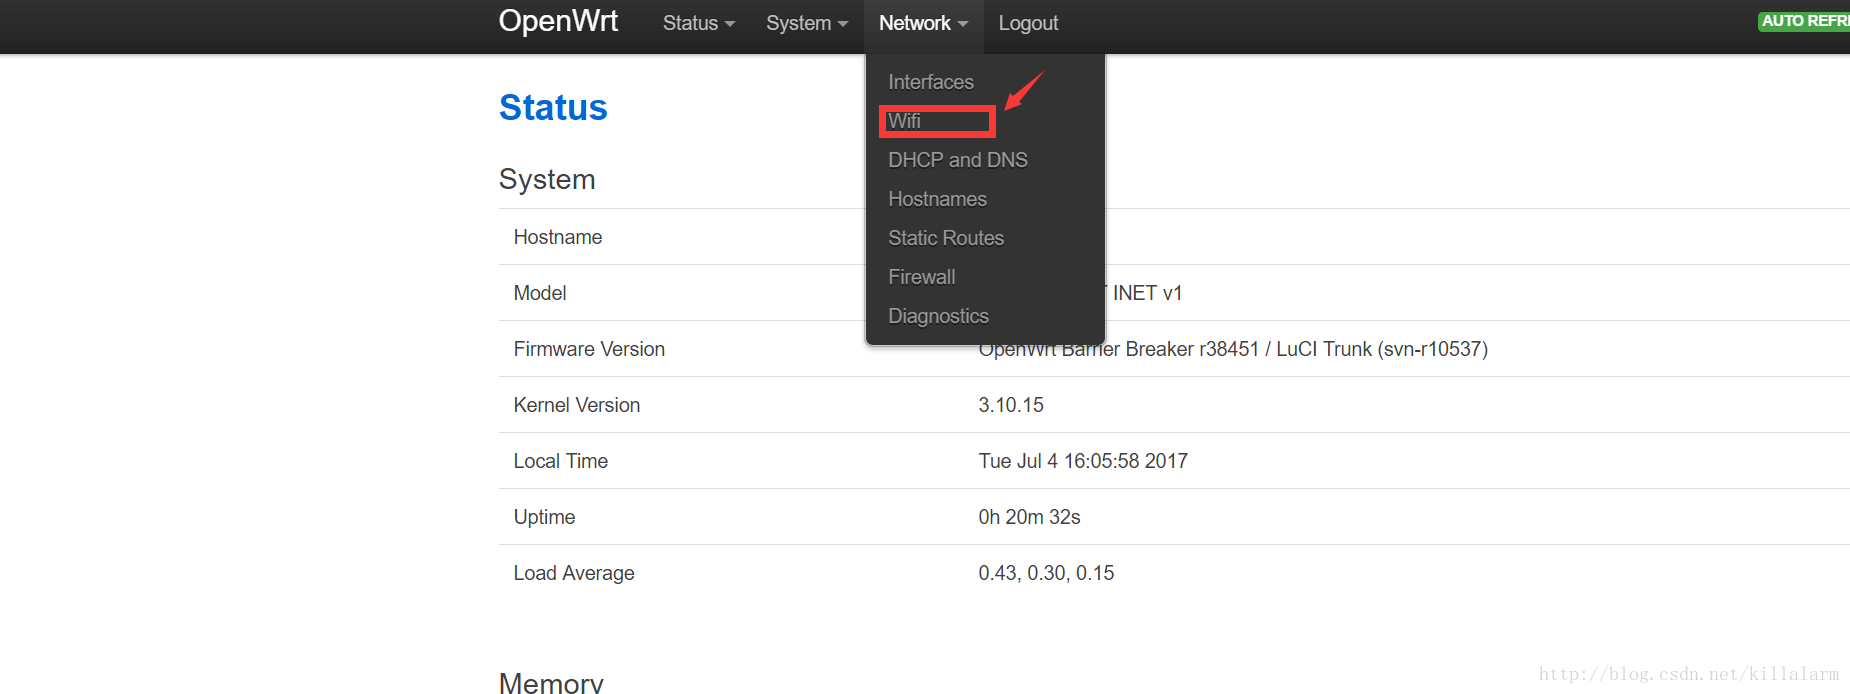
Step 5: login luci to configure wifi


Step 6:


ref:
https://wiki.openwrt.org/zh-cn/doc/howto/firstlogin
https://blog.csdn.net/killalarm/article/details/74364685


Tuesday, 13 March 2018

Tinkering OpenWRT (5) : Build OpenWRT Source Code

Step 1: Inslall softwares
sudo apt-get install subversion g++ zlib1g-dev build-essential git python rsync man-db 
sudo apt-get install libncurses5-dev gawk gettext unzip file libssl-dev wget

Step 2: download source
git clone https://git.lede-project.org/source.git lede 
cd lede 

Step 3:
./scripts/feeds update -a 
./scripts/feeds install -a 

Step 4:
make menuconfig # Maximum the terminal when doing this.
More research needs to be done here to fit different systems. Here we compile for VirtualBox as an example.
      “Target System” ⇒ “x86”
      “Target Images” ⇒ “Build VirtualBox image files(VDI)”
Save and Exit.

Step 5: Compile
make
 make[1] world
 make[2] tools/compile
 make[3] -C tools/flock compile
 make[3] -C tools/sed compile
 make[3] -C tools/patch compile
 make[3] -C tools/xz compile
 make[3] -C tools/tar compile
 make[3] -C tools/m4 compile
 make[3] -C tools/autoconf compile
 make[3] -C tools/pkg-config compile
 make[3] -C tools/automake compile
 make[3] -C tools/missing-macros compile
 make[3] -C tools/libtool compile
 make[3] -C tools/gmp compile
 make[3] -C tools/mpfr compile
 make[3] -C tools/mpc compile
 make[3] -C tools/libelf compile
 make[3] -C tools/expat compile
 make[3] -C tools/flex compile
 make[3] -C tools/bison compile
 make[3] -C tools/mklibs compile
 make[3] -C tools/sstrip compile
 make[3] -C tools/make-ext4fs compile
 make[3] -C tools/e2fsprogs compile
 make[3] -C tools/mtd-utils compile
 make[3] -C tools/libressl compile
 make[3] -C tools/mkimage compile
 make[3] -C tools/firmware-utils compile
 make[3] -C tools/patch-image compile
 make[3] -C tools/findutils compile
 make[3] -C tools/quilt compile
 make[3] -C tools/padjffs2 compile
 make[3] -C tools/mm-macros compile
 make[3] -C tools/cmake compile
 make[3] -C tools/scons compile
 make[3] -C tools/bc compile
 make[3] -C tools/gengetopt compile
 make[3] -C tools/patchelf compile
 make[3] -C tools/mtools compile
 make[3] -C tools/dosfstools compile
 make[3] -C tools/qemu compile
 make[3] -C tools/lzma compile
 make[3] -C tools/squashfs4 compile
 make[2] toolchain/compile
 make[3] -C toolchain/gdb compile
 make[3] -C toolchain/binutils compile
 make[3] -C toolchain/gcc/initial compile
 make[3] -C toolchain/kernel-headers compile
 make[3] -C toolchain/musl compile
 make[3] -C toolchain/gcc/final compile
 make[3] -C toolchain/fortify-headers compile
 make[3] -C toolchain/yasm compile
 make[2] target/compile
 make[3] -C target/linux compile
 make[2] diffconfig
 make[2] package/cleanup
 make[2] package/compile
 make[3] -C package/libs/libubox host-compile
 make[3] -C package/system/opkg host-compile
 make[3] -C package/libs/toolchain compile
 make[3] -C package/libs/libnl-tiny compile
 make[3] -C package/libs/libjson-c compile
 make[3] -C package/utils/lua compile
 make[3] -C package/libs/libubox compile
 make[3] -C package/system/ubus compile
 make[3] -C package/system/uci compile
 make[3] -C package/network/config/netifd compile
 make[3] -C package/firmware/linux-firmware compile
 make[3] -C package/firmware/prism54-firmware compile
 make[3] -C package/kernel/linux compile
 make[3] -C package/system/ubox compile
 make[3] -C package/libs/ncurses host-compile
 make[3] -C package/libs/zlib compile
 make[3] -C package/libs/ncurses compile
 make[3] -C package/utils/util-linux compile
 make[3] -C package/system/fstools compile
 make[3] -C package/system/fwtool host-compile
 make[3] -C package/system/fwtool compile
 make[3] -C package/system/procd compile
 make[3] -C package/system/usign host-compile
 make[3] -C package/utils/jsonfilter compile
 make[3] -C package/system/lede-keyring compile
 make[3] -C package/system/usign compile
 make[3] -C package/base-files compile
 make[3] -C package/boot/grub2 host-compile
 make[3] -C package/boot/grub2 compile
 make[3] -C package/kernel/button-hotplug compile
 make[3] -C package/libs/mbedtls compile
 make[3] -C package/libs/ustream-ssl compile
 make[3] -C package/libs/uclient compile
 make[3] -C package/network/utils/iptables compile
 make[3] -C package/network/config/firewall compile
 make[3] -C package/network/ipv6/odhcp6c compile
 make[3] -C package/network/services/dnsmasq compile
 make[3] -C package/network/services/dropbear compile
 make[3] -C package/network/services/odhcpd compile
 make[3] -C package/libs/libpcap compile
 make[3] -C package/network/utils/linux-atm compile
 make[3] -C package/network/utils/resolveip compile
 make[3] -C package/network/services/ppp compile
 make[3] -C package/system/mtd compile
 make[3] -C package/system/opkg compile
 make[3] -C package/utils/busybox compile
 make[3] -C package/utils/e2fsprogs compile
 make[3] -C package/utils/f2fs-tools compile
 make[2] package/install
 make[2] target/install
 make[3] -C target/linux install
 make[2] package/index
 make[2] checksum

It took my T420 almost 2 hours to finish the first make...You can ultimately find the results in the bin file.

############################################3

Keep updated with the official website:
    https://openwrt.org/docs/guide-developer/quickstart-build-images


ref:
https://www.youtube.com/watch?v=kjzQg_sB8rY
https://openwrt.org/docs/guide-developer/quickstart-build-images!!!!!!
http://blog.csdn.net/gubenpeiyuan/article/details/8024247

Wednesday, 7 March 2018

Tinkering OpenWRT (6) : Connect Raspberry Pi to Computer with TTL-USB Converter FTDI

It must be frustrating to use a Pi as a new computer and give it all the peripherals like mouse and keyboards and most annoying one, an extra monitor. We can simply use the serial port to connect the Pi with Computer. Here is how.

Step 1:
Plug in the FTDI module and do:
       ls /dev/ttyUSB*
usually FTDI is mounted at ttyUSB0.

Step 2:
Conncet FTDI with your PI, I am using B+ model.


Step 3:
      screen /dev/ttyUSB0 115200

And voila!

BusyBox v1.23.2 (2016-01-31 10:28:42 CET) built-in shell (ash)

  _______                     ________        __
 |       |.-----.-----.-----.|  |  |  |.----.|  |_
 |   -   ||  _  |  -__|     ||  |  |  ||   _||   _|
 |_______||   __|_____|__|__||________||__|  |____|
          |__| W I R E L E S S   F R E E D O M
 -----------------------------------------------------
 CHAOS CALMER (15.05.1, r48532)
 -----------------------------------------------------
  * 1 1/2 oz Gin            Shake with a glassful
  * 1/4 oz Triple Sec       of broken ice and pour
  * 3/4 oz Lime Juice       unstrained into a goblet.
  * 1 1/2 oz Orange Juice
  * 1 tsp. Grenadine Syrup
 -----------------------------------------------------
root@OpenWrt:/# [   19.795613] random: nonblocking pool is initialized

root@OpenWrt:/# 

Step 4: Blinky
root@OpenWrt:/# ls -1 /sys/class/leds/
led0

root@OpenWrt:/# echo 1 > /sys/class/leds/led0/brightness     // ? just blink?
root@OpenWrt:/# echo 0 > /sys/class/leds/led0/brightness     // off
root@OpenWrt:/# echo 1 > /sys/class/leds/led0/brightness     // NOW KELP ON ??!!!


ref:
http://caoyudong.com/2015/10/03/%E9%80%9A%E8%BF%87USB%E8%BD%AC%E4%B8%B2%E5%8F%A3%E6%A8%A1%E5%9D%97%E8%BF%9E%E6%8E%A5%E6%A0%91%E8%8E%93%E6%B4%BE/
http://ediy.com.my/index.php/tutorials/item/131-openwrt-control-led-manually
http://hacklabos.org/2014/04/playing-with-gpio-and-sensors-on-openwrt/

Sunday, 4 March 2018

Tinkering OpenWRT (4) : make config

When I tried to configure my make config menu for openwrt, I got:

Your display is too small to run Menuconfig!
It must be at least 19 lines by 80 columns.
/home/boris/workspace/openWRT/WRTKernel/source/include/toplevel.mk:136: recipe for target 'menuconfig' failed
make: *** [menuconfig] Error 1

Don't worry, this simply means you have to maximize your terminal window.

Wednesday, 28 February 2018

Tinkering OpenWRT (3) : Setting up OpenWRT on a Raspberry Pi

Step 1: Use an SD Card Reader to load up a MicroSD card.

Step 2: I'm using Raspberry Pi B+, that's an RPi 1.
So from:
     https://wiki.openwrt.org/toh/raspberry_pi_foundation/raspberry_pi
download:
     Raspberry Pi 1: http://downloads.openwrt.org/chaos_calmer/15.05.1/brcm2708/bcm2708/

Step 3:
Use etcher to make an bootable SD card.

Step 4: insert the bootable SD card to RPi.


ref:
https://www.raspberrypi.org/documentation/installation/installing-images/      !!!!!
https://etcher.io/                                                                                                   !!!!!

http://www.ct-networks.io/community/tutorials/openwrt-installing-firmware-on-raspberry-pi.html   !!
https://devzone.nordicsemi.com/b/blog/posts/trying-openwrt-chaos-calmer-1505-rc1-on-raspberry-
https://computers.tutsplus.com/articles/installing-openwrt-on-a-raspberry-pi-as-a-new-home-firewall--mac-55984
https://www.qualityology.com/tech/how-to-install-openwrt-on-raspberry-pi/
https://tecadmin.net/format-usb-in-linux/

Friday, 16 February 2018

Tinkering OpenWRT (2) : Installing Softwares (eg. Python)

For example, I want to install Python.

Do this first!!!!
opkg update

Now we can install Python related packages:

opkg install libffi
opkg install python-mini
opkg install python
opkg install python-openssl


ref:
http://www.rendoumi.com/openwrtan-zhuang-python-pip/
http://blog.csdn.net/frankechen/article/details/78660437
http://www.cnblogs.com/xianfangloveyangmei/p/4091882.html